Gadget Functions
RGB LED Matrix
Purpose Of This Page
This page explains how to control the 4 by 4 RGB LED Matrix on the CodyJoy Pro using Python.
By the end of this page, students will be able to:
- Turn on one RGB LED by LED number.
- Turn on one RGB LED by
(x, y)coordinate. - Use built-in color codes.
- Use RGB hex colors.
- Use RGB percentage colors.
- Clear all RGB LEDs.
Start Code
Every CodyNick Python script should import the CodyNick library and connect to the CodyNick device.
import CodyNick

cn = CodyNick.CN()
The variable cn represents the connected CodyNick device. It is passed to the CodyNick functions so Python knows which device to control.
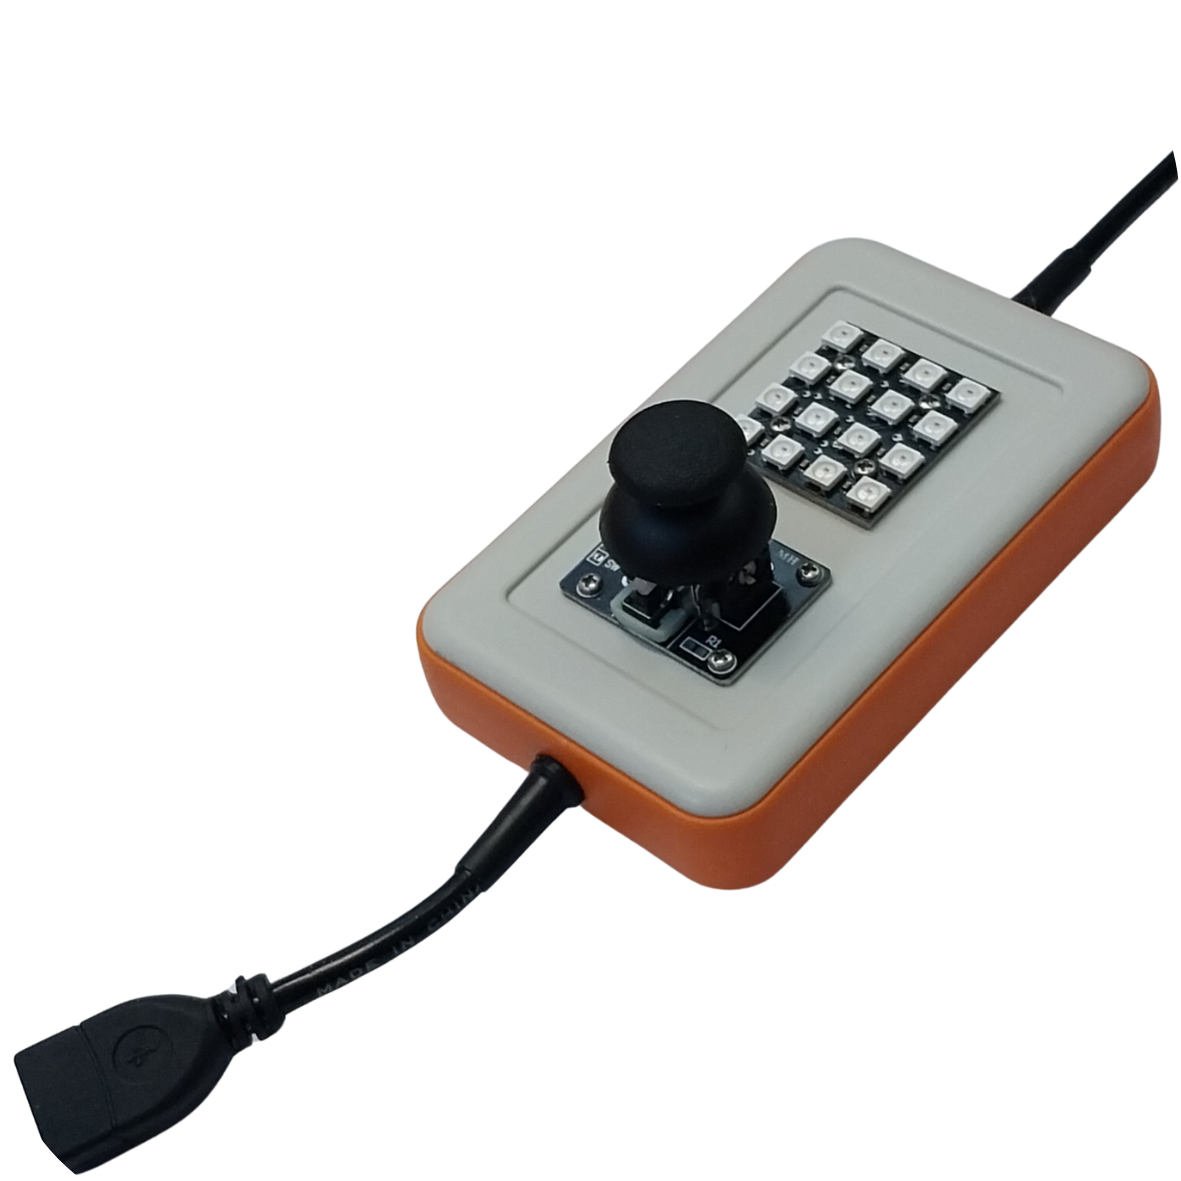
RGB LED Number Layout
The CodyJoy Pro RGB LEDs are numbered as shown below:
15  14  13  12
 8   9  10  11
 7   6   5   4
 0   1   2   3
Important positions:
- LED
0is the bottom-left LED. - LED
3is the bottom-right LED. - LED
15is the top-left LED. - LED
12is the top-right LED.
Turn On One LED By Number
Use RGB_Matrix.set() to turn on one LED.
Function format:
CodyNick.RGB_Matrix.set(cn, led_number, color)
Example:
import CodyNick

cn = CodyNick.CN()

CodyNick.RGB_Matrix.set(cn, 15, "#FF0000")
This turns LED 15 red.
Another example:
CodyNick.RGB_Matrix.set(cn, 0, "#00FF00")
This turns LED 0 green.
Clear The RGB Matrix
Use RGB_Matrix.clear() to turn off all RGB LEDs.
CodyNick.RGB_Matrix.clear(cn)
Example:
import CodyNick
import time

cn = CodyNick.CN()

CodyNick.RGB_Matrix.set(cn, 15, "#FF0000")
time.sleep(1)
CodyNick.RGB_Matrix.clear(cn)
This turns LED 15 red for one second, then turns all LEDs off.
Built-In Color Codes
The easiest way to choose a color is to use one of the built-in color codes from 0 to 7.
| Code | Name | Hex |
|---|---|---|
| 0 | Red | #FF0000 |
| 1 | Cyan | #00FFFF |
| 2 | Blue | #0000FF |
| 3 | Yellow | #FFFF00 |
| 4 | Magenta | #FF00FF |
| 5 | Green | #00FF00 |
| 6 | Orange | #FF8000 |
| 7 | White | #FFFFFF |
Example:
import CodyNick

cn = CodyNick.CN()

CodyNick.RGB_Matrix.set(cn, 15, 0)
This turns LED 15 red, because color code 0 means red.
RGB Hex Colors
Students can also use RGB hex colors.
An RGB hex color starts with # and has six hexadecimal characters:
"#RRGGBB"
RR controls red, GG controls green, and BB controls blue.
Common examples:
| Color | Hex |
|---|---|
| Red | #FF0000 |
| Green | #00FF00 |
| Blue | #0000FF |
| Cyan | #00FFFF |
| Yellow | #FFFF00 |
| Magenta | #FF00FF |
| White | #FFFFFF |
Example:
import CodyNick

cn = CodyNick.CN()

CodyNick.RGB_Matrix.set(cn, 12, "#00FFFF")
This turns LED 12 cyan.
RGB Percentage Colors
Students can also describe a color with red, green, and blue percentages.
Format:
[red_percent, green_percent, blue_percent]
Each number must be between 0 and 100.
Examples:
| Color Input | Meaning |
|---|---|
[100, 0, 0] |
100% red |
[0, 100, 0] |
100% green |
[0, 0, 100] |
100% blue |
[0, 100, 100] |
cyan |
[100, 100, 0] |
yellow |
[50, 0, 0] |
dim red |
Example:
import CodyNick

cn = CodyNick.CN()

CodyNick.RGB_Matrix.set(cn, 10, [0, 100, 100])
This turns LED 10 cyan.
Coordinate Layout
Students can also control LEDs by (x, y) coordinate.
The bottom-left LED is (0, 0).
The top-right LED is (3, 3).
(0,3)  (1,3)  (2,3)  (3,3)
(0,2)  (1,2)  (2,2)  (3,2)
(0,1)  (1,1)  (2,1)  (3,1)
(0,0)  (1,0)  (2,0)  (3,0)
Use RGB_Matrix.set_xy() to control one LED by coordinate.
Function format:
CodyNick.RGB_Matrix.set_xy(cn, x, y, color)
Example:
import CodyNick

cn = CodyNick.CN()

CodyNick.RGB_Matrix.set_xy(cn, 0, 0, "#FF0000")
This turns the bottom-left LED red.
Another example:
CodyNick.RGB_Matrix.set_xy(cn, 3, 3, 2)
This turns the top-right LED blue, because color code 2 means blue.
Example: Four Corners
This example lights the four corner LEDs with different colors.
import CodyNick

cn = CodyNick.CN()

CodyNick.RGB_Matrix.clear(cn)

CodyNick.RGB_Matrix.set_xy(cn, 0, 0, 0)          # bottom-left red
CodyNick.RGB_Matrix.set_xy(cn, 3, 0, 5)          # bottom-right green
CodyNick.RGB_Matrix.set_xy(cn, 0, 3, 2)          # top-left blue
CodyNick.RGB_Matrix.set_xy(cn, 3, 3, "#FFFF00")  # top-right yellow
Example: Show All Built-In Colors
This example shows all eight built-in colors one by one.
import CodyNick
import time

cn = CodyNick.CN()

for color_code in range(8):
    CodyNick.RGB_Matrix.clear(cn)
    CodyNick.RGB_Matrix.set(cn, color_code, color_code)
    time.sleep(0.5)
In this loop, the LED number and the color code are both using color_code.
Example: Center LEDs
The center four LEDs are:
(1,2)  (2,2)
(1,1)  (2,1)
Example:
import CodyNick

cn = CodyNick.CN()

CodyNick.RGB_Matrix.clear(cn)

CodyNick.RGB_Matrix.set_xy(cn, 1, 1, "#FF0000")
CodyNick.RGB_Matrix.set_xy(cn, 2, 1, "#00FF00")
CodyNick.RGB_Matrix.set_xy(cn, 1, 2, "#0000FF")
CodyNick.RGB_Matrix.set_xy(cn, 2, 2, "#FFFFFF")
Practice Tasks
Try these exercises:
- Turn on LED
0in red. - Turn on LED
12in blue. - Clear the matrix after two seconds.
- Turn on all four corners with different colors.
- Use
set_xy()to light the center four LEDs. - Create a loop that moves one light from LED
0to LED15. - Use percentage colors to make dim red, dim green, and dim blue.
Common Mistakes
Hex colors must be written as strings:
CodyNick.RGB_Matrix.set(cn, 0, "#FF0000")
This is not correct:
CodyNick.RGB_Matrix.set(cn, 0, #FF0000)
Color percentages must use numbers from 0 to 100:
CodyNick.RGB_Matrix.set(cn, 0, [100, 50, 0])
Coordinates must be between 0 and 3:
CodyNick.RGB_Matrix.set_xy(cn, 3, 3, 7)
This is outside the matrix:
CodyNick.RGB_Matrix.set_xy(cn, 4, 0, 7)
If old LEDs stay on, clear the matrix before drawing the next pattern:
CodyNick.RGB_Matrix.clear(cn)
The RGB LED Matrix can be controlled by LED number or by `(x, y)` coordinate. Colors can be written as built-in color codes, RGB hex values, or RGB percentage lists.
Joystick
Purpose Of This Page
This page explains how to read the CodyJoy Pro joystick using Python.
The CodyJoy Pro includes several built-in features, including:
- RGB LED Matrix.
- Joystick.
- Sound Maker.
This page focuses only on the joystick.
By the end of this page, students will be able to:
- Detect joystick direction.
- Detect joystick button clicks.
- Read all joystick states at once.
- Use joystick input inside a Python loop.
Start Code
Every CodyNick Python script should import the CodyNick library and connect to the CodyNick device.
import CodyNick

cn = CodyNick.CN()
The variable cn represents the connected CodyNick device.
Joystick Directions
The joystick can be moved in four main directions:
- Up
- Down
- Left
- Right
The joystick can also be pressed like a button. This is called a click.
Check One Direction
Use Joystick.position() to check one direction.
Function format:
CodyNick.Joystick.position(cn, direction)
The direction should be one of:
"up"
"down"
"left"
"right"
Example:
import CodyNick

cn = CodyNick.CN()

if CodyNick.Joystick.position(cn, "up"):
    print("Joystick is up")
This prints a message if the joystick is moved up.
Check For A Click
Use Joystick.click() to check whether the joystick button is pressed.
Function format:
CodyNick.Joystick.click(cn)
Example:
import CodyNick

cn = CodyNick.CN()

if CodyNick.Joystick.click(cn):
    print("Joystick clicked")
Read All Joystick States
Use Joystick.states() to read the current joystick state once.
Function format:
CodyNick.Joystick.states(cn)
This returns a list.
Examples of possible results:
| Result | Meaning |
|---|---|
[] |
No direction or click |
["UP"] |
Joystick is moved up |
["DOWN"] |
Joystick is moved down |
["LEFT"] |
Joystick is moved left |
["RIGHT"] |
Joystick is moved right |
["CLICK"] |
Joystick button is pressed |
["UP", "CLICK"] |
Joystick is moved up and clicked |
Example:
import CodyNick

cn = CodyNick.CN()

states = CodyNick.Joystick.states(cn)
print(states)
Example: Print Joystick Movement
This example continuously checks the joystick and prints the direction.
import CodyNick
import time

cn = CodyNick.CN()

while True:
    if CodyNick.Joystick.position(cn, "up"):
        print("up")

    if CodyNick.Joystick.position(cn, "down"):
        print("down")

    if CodyNick.Joystick.position(cn, "left"):
        print("left")

    if CodyNick.Joystick.position(cn, "right"):
        print("right")

    if CodyNick.Joystick.click(cn):
        print("click")

    time.sleep(0.1)
The time.sleep(0.1) line slows the loop down slightly. Without it, Python may print too many messages very quickly.
Example: Read Once Per Loop
For larger programs, it is often better to read the joystick once per loop using states().
import CodyNick
import time

cn = CodyNick.CN()

while True:
    states = CodyNick.Joystick.states(cn)

    if "UP" in states:
        print("up")
    elif "DOWN" in states:
        print("down")
    elif "LEFT" in states:
        print("left")
    elif "RIGHT" in states:
        print("right")
    elif "CLICK" in states:
        print("click")

    time.sleep(0.1)
This style is useful when one program needs to react to different joystick actions.
Example: Count Button Clicks
This example counts how many times the joystick button is clicked.
import CodyNick
import time

cn = CodyNick.CN()

click_count = 0
was_clicked = False

while True:
    is_clicked = CodyNick.Joystick.click(cn)

    if is_clicked and not was_clicked:
        click_count = click_count + 1
        print("Clicks:", click_count)

    was_clicked = is_clicked
    time.sleep(0.05)
The variable was_clicked helps count one click at a time instead of counting the same press many times.
Function Summary
| Function | Purpose | Example |
|---|---|---|
Joystick.position(cn, "up") |
Check if joystick is up | if Joystick.position(cn, "up"): |
Joystick.position(cn, "down") |
Check if joystick is down | if Joystick.position(cn, "down"): |
Joystick.position(cn, "left") |
Check if joystick is left | if Joystick.position(cn, "left"): |
Joystick.position(cn, "right") |
Check if joystick is right | if Joystick.position(cn, "right"): |
Joystick.click(cn) |
Check if joystick button is pressed | if Joystick.click(cn): |
Joystick.states(cn) |
Read all joystick states once | states = Joystick.states(cn) |
Practice Tasks
Try these exercises:
- Print
upwhen the joystick is moved up. - Print all four directions when they happen.
- Print
clickedwhen the joystick button is pressed. - Count how many times the joystick is clicked.
- Print the full list returned by
Joystick.states(cn). - Write a program that prints only when the direction changes.
Common Mistakes
Direction names must be lowercase when using Joystick.position().
Correct:
CodyNick.Joystick.position(cn, "up")
Not correct:
CodyNick.Joystick.position(cn, "UP")
The result from Joystick.states() uses uppercase state names:
states = CodyNick.Joystick.states(cn)

if "UP" in states:
    print("up")
If the terminal prints too fast, add a short delay inside the loop:
time.sleep(0.1)
The joystick can be read by checking one direction, checking for a click, or reading all current states at once. Use `Joystick.states(cn)` when a program needs to make several decisions from one joystick reading.
Sound Maker (Buzzer)
Purpose Of This Page
This page explains how to play musical notes with the CodyJoy Pro Sound Maker using Python.
The CodyJoy Pro includes several built-in features, including:
- RGB LED Matrix.
- Joystick.
- Sound Maker.
This page focuses only on the Sound Maker.
By the end of this page, students will be able to:
- Play a musical note.
- Choose how long a note should play.
- Use sharp notes such as
F#2. - Use flat notes such as
Gb2. - Play a note and continue immediately.
- Play a note and wait until it is done.
Start Code
Every CodyNick Python script should import the CodyNick library and connect to the CodyNick device.
import CodyNick

cn = CodyNick.CN()
The variable cn represents the connected CodyNick device.
Play A Note
Use CJP_Sound_Maker.play() to play a note.
Function format:
CodyNick.CJP_Sound_Maker.play(cn, note, duration_ms)
Example:
import CodyNick

cn = CodyNick.CN()

CodyNick.CJP_Sound_Maker.play(cn, "F#2", 300)
This plays note F#2 for 300 milliseconds.
The program continues immediately after starting the sound.
Play Until Done
Use CJP_Sound_Maker.play_until_done() when Python should wait until the note is finished.
Function format:
CodyNick.CJP_Sound_Maker.play_until_done(cn, note, duration_ms)
Example:
import CodyNick

cn = CodyNick.CN()

CodyNick.CJP_Sound_Maker.play_until_done(cn, "C4", 500)
print("The note is finished")
This plays note C4 for 500 milliseconds. The message is printed after the note is done.
Duration
The duration is written in milliseconds.
Common examples:
| Duration | Meaning |
|---|---|
100 |
0.1 second |
250 |
0.25 second |
500 |
0.5 second |
1000 |
1 second |
Example:
CodyNick.CJP_Sound_Maker.play(cn, "A4", 1000)
This plays note A4 for one second.
Sharp And Flat Notes
Sharp notes use #.
Example:
CodyNick.CJP_Sound_Maker.play(cn, "F#2", 300)
Flat notes use b.
Example:
CodyNick.CJP_Sound_Maker.play(cn, "Gb2", 300)
F#2 and Gb2 are the same pitch.
Example: Play A Short Melody
This example plays a short melody using play_until_done().
import CodyNick

cn = CodyNick.CN()

CodyNick.CJP_Sound_Maker.play_until_done(cn, "C4", 250)
CodyNick.CJP_Sound_Maker.play_until_done(cn, "D4", 250)
CodyNick.CJP_Sound_Maker.play_until_done(cn, "E4", 250)
CodyNick.CJP_Sound_Maker.play_until_done(cn, "G4", 500)
Because play_until_done() waits, the notes play one after another.
Example: Melody With A Loop
This example stores notes in a list and plays them in a loop.
import CodyNick

cn = CodyNick.CN()

notes = ["C4", "D4", "E4", "F4", "G4", "A4", "B4", "C5"]

for note in notes:
    CodyNick.CJP_Sound_Maker.play_until_done(cn, note, 250)
This plays a simple scale from C4 to C5.
Example: Continue Immediately
This example starts a note and immediately continues to the next line.
import CodyNick

cn = CodyNick.CN()

CodyNick.CJP_Sound_Maker.play(cn, "C5", 500)
print("This prints while the sound may still be playing")
Use play() when the program should continue immediately.
Use play_until_done() when the program should wait.
Function Summary
| Function | Purpose | Example |
|---|---|---|
CJP_Sound_Maker.play(cn, note, duration_ms) |
Play and continue immediately | play(cn, "F#2", 300) |
CJP_Sound_Maker.play_until_done(cn, note, duration_ms) |
Play and wait until done | play_until_done(cn, "C4", 500) |
Supported Notes
The Sound Maker supports notes from B0 to D#8.
The table below shows the supported sharp-note notation and approximate frequencies.
| Note | Hz | Note | Hz | Note | Hz | Note | Hz |
|---|---|---|---|---|---|---|---|
| B0 | 31 | C1 | 33 | C#1 | 35 | D1 | 37 |
| D#1 | 39 | E1 | 41 | F1 | 44 | F#1 | 46 |
| G1 | 49 | G#1 | 52 | A1 | 55 | A#1 | 58 |
| B1 | 62 | C2 | 65 | C#2 | 69 | D2 | 73 |
| D#2 | 78 | E2 | 82 | F2 | 87 | F#2 | 93 |
| G2 | 98 | G#2 | 104 | A2 | 110 | A#2 | 117 |
| B2 | 123 | C3 | 131 | C#3 | 139 | D3 | 147 |
| D#3 | 156 | E3 | 165 | F3 | 175 | F#3 | 185 |
| G3 | 196 | G#3 | 208 | A3 | 220 | A#3 | 233 |
| B3 | 247 | C4 | 262 | C#4 | 277 | D4 | 294 |
| D#4 | 311 | E4 | 330 | F4 | 349 | F#4 | 370 |
| G4 | 392 | G#4 | 415 | A4 | 440 | A#4 | 466 |
| B4 | 494 | C5 | 523 | C#5 | 554 | D5 | 587 |
| D#5 | 622 | E5 | 659 | F5 | 698 | F#5 | 740 |
| G5 | 784 | G#5 | 831 | A5 | 880 | A#5 | 932 |
| B5 | 988 | C6 | 1047 | C#6 | 1109 | D6 | 1175 |
| D#6 | 1245 | E6 | 1319 | F6 | 1397 | F#6 | 1480 |
| G6 | 1568 | G#6 | 1661 | A6 | 1760 | A#6 | 1865 |
| B6 | 1976 | C7 | 2093 | C#7 | 2217 | D7 | 2349 |
| D#7 | 2489 | E7 | 2637 | F7 | 2794 | F#7 | 2960 |
| G7 | 3136 | G#7 | 3322 | A7 | 3520 | A#7 | 3729 |
| B7 | 3951 | C8 | 4186 | C#8 | 4435 | D8 | 4699 |
| D#8 | 4978 |
Practice Tasks
Try these exercises:
- Play
C4for500milliseconds. - Play
A4for one second. - Play
F#2for300milliseconds. - Play the same pitch using
Gb2. - Create a list of notes and play them in a loop.
- Write a short melody using at least five notes.
- Compare
play()andplay_until_done()by printing a message after each function call.
Common Mistakes
Notes must be written as strings:
CodyNick.CJP_Sound_Maker.play(cn, "C4", 500)
This is not correct:
CodyNick.CJP_Sound_Maker.play(cn, C4, 500)
The duration is in milliseconds, not seconds:
CodyNick.CJP_Sound_Maker.play(cn, "C4", 1000)
This plays for one second.
Use play_until_done() when the next note should wait:
CodyNick.CJP_Sound_Maker.play_until_done(cn, "C4", 250)
CodyNick.CJP_Sound_Maker.play_until_done(cn, "D4", 250)
If play() is used for many notes in a row, later notes may start before earlier notes are finished.
The Sound Maker plays musical notes by name. Use `play()` to start a note and continue immediately, or use `play_until_done()` when Python should wait until the note is finished.
Seven Segment Display
Purpose Of This Page
This page explains how to show numbers on the CodyNick Seven Segment Display using Python.
The Seven Segment Display is useful for showing:
- Scores.
- Counts.
- Sensor values.
- Timer values.
- Simple numeric feedback.
By the end of this page, students will be able to:
- Display a positive number.
- Display a negative number.
- Display a decimal number.
- Update the displayed value inside a Python program.

Start Code
Every CodyNick Python script should import the CodyNick library and connect to the CodyNick device.
import CodyNick

cn = CodyNick.CN()
The variable cn represents the connected CodyNick device.
Display A Number
Use Seven_Segment.display() to show a number.
Function format:
CodyNick.Seven_Segment.display(cn, value)
Example:
import CodyNick

cn = CodyNick.CN()

CodyNick.Seven_Segment.display(cn, 1234)
This displays 1234.
Display A Negative Number
The display can show negative values.
Example:
import CodyNick

cn = CodyNick.CN()

CodyNick.Seven_Segment.display(cn, -123)
This displays -123.
Display A Decimal Number
The display can also show decimal values.
Example:
import CodyNick

cn = CodyNick.CN()

CodyNick.Seven_Segment.display(cn, 1.234)
This displays 1.234 if the value fits on the display.
Using Strings Or Numbers
The value can be passed as a number:
CodyNick.Seven_Segment.display(cn, 1234)
It can also be passed as a string:
CodyNick.Seven_Segment.display(cn, "1234")
Both examples display the same value.
Display Range
The display is designed for short numeric values.
Typical useful values are:
| Type | Example |
|---|---|
| Positive integer | 1234 |
| Negative integer | -123 |
| Decimal number | 1.234 |
| Small decimal | -1.23 |
Very large or very small values may not fit on the display.
In the CodyNick Python library, values outside the normal display range are treated as out of range.
Example: Count Up
This example counts from 0 to 9.
import CodyNick
import time

cn = CodyNick.CN()

for number in range(10):
    CodyNick.Seven_Segment.display(cn, number)
    time.sleep(0.5)
The number changes every half second.
Example: Countdown
This example counts down from 5 to 0.
import CodyNick
import time

cn = CodyNick.CN()

for number in range(5, -1, -1):
    CodyNick.Seven_Segment.display(cn, number)
    time.sleep(1)
The third value in range(5, -1, -1) means the loop counts down by 1.
Example: Show Decimal Values
This example displays a few decimal values.
import CodyNick
import time

cn = CodyNick.CN()

values = [1.234, 2.5, 3.75, -1.23]

for value in values:
    CodyNick.Seven_Segment.display(cn, value)
    time.sleep(1)
Function Summary
| Function | Purpose | Example |
|---|---|---|
Seven_Segment.display(cn, value) |
Display a number | display(cn, 1234) |
Practice Tasks
Try these exercises:
- Display
1234. - Display
-123. - Display
1.234. - Count from
0to9. - Count down from
9to0. - Display a list of decimal values.
- Create a timer that counts seconds.
Common Mistakes
The first argument must be the connected CodyNick device:
CodyNick.Seven_Segment.display(cn, 1234)
This is not correct:
CodyNick.Seven_Segment.display(1234)
If a value is too long, it may not appear as expected on the display.
Use short numeric values:
CodyNick.Seven_Segment.display(cn, 1234)
When using a loop, add a delay so each value can be seen:
time.sleep(0.5)
The Seven Segment Display shows short numeric values. Use `Seven_Segment.display(cn, value)` to display integers, negative numbers, or decimal numbers from Python.